





Lock Excel Row
Lock excel row. Learn how to lock an Excel row two ways: freeze panes to keep headers visible while scrolling, and protect sheets


You scroll down a shared tracker and the column headings disappear. A few rows later, a teammate types over a formula because the calculation looks like an ordinary blank cell. When someone asks how to “lock an Excel row,” they may be describing either problem, and Excel uses different tools for each one.
Freeze Panes keeps a row visible while you scroll. Sheet protection controls whether people can edit cells. You can use either feature alone, or combine them when a workbook needs to stay easy to use without exposing formulas to accidental changes.
Table of Contents
- Two Ways to Lock an Excel Row
- Freezing Rows So Headers Stay Visible
- Protecting Rows From Being Edited
- Mixed Permissions for Shared Workbooks
- Quick Fixes and Takeaways
Two Ways to Lock an Excel Row
The phrase lock Excel row has two meanings in everyday spreadsheet conversations.
If the problem is that headings vanish as you move down the worksheet, you need a visual lock. Excel calls this Freeze Panes. It leaves the row editable, but keeps it displayed at the top while the rest of the sheet moves.
If the problem is that someone keeps changing labels, formulas, or completed entries, you need an edit lock. That means configuring cell locking and then turning on worksheet protection. Protection prevents editing according to the permissions you choose, while Freeze Panes only changes what remains visible during scrolling. Microsoft documents these as separate features in its guidance on freezing panes and protecting worksheet cells.
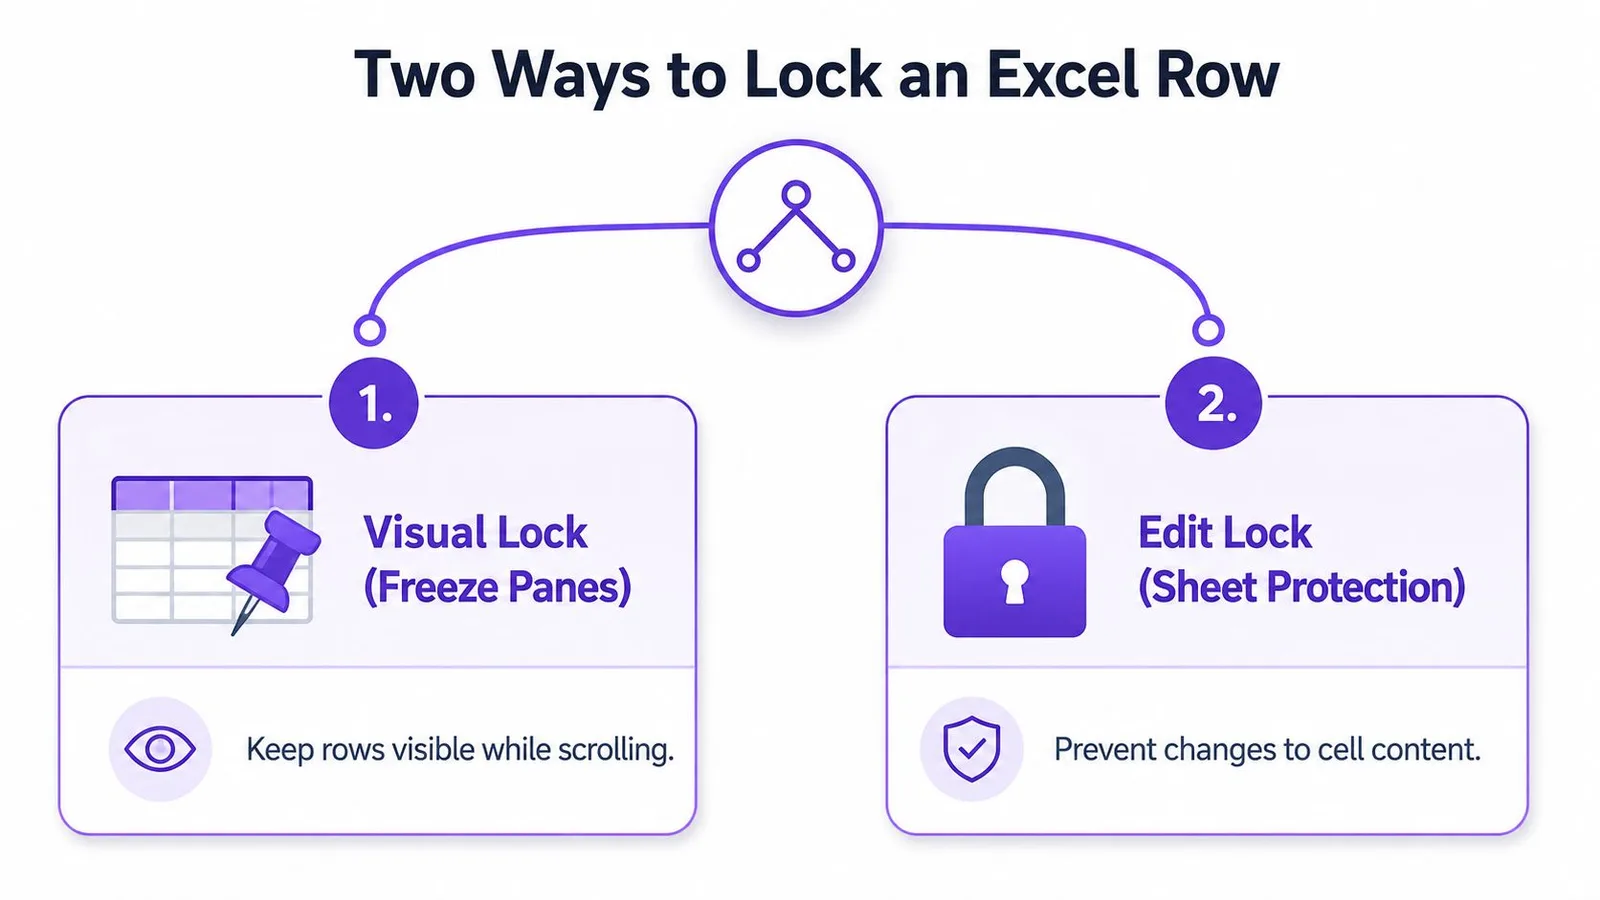
Choose the tool by the problem
Use Freeze Top Row when you want headings such as Item, Owner, Status, or Total to remain visible. Use Freeze Panes when several top rows need to stay on screen, or when you also want to keep a leading column visible.
Use sheet protection when users should be able to enter information but shouldn’t alter formulas or fixed labels. The two tools can work together. A budget can keep its headings visible while protecting calculation cells and leaving approved input cells open.
Practical rule: If you can still click and change a frozen row, Excel is behaving correctly. Freezing affects visibility, not editing.
The rest of the guide separates these workflows carefully, then brings them together for shared budgets, trackers, and forms. If you work mainly in Google Sheets, you can also compare the workflow with spreadsheet assistance in Google Sheets.
Freezing Rows So Headers Stay Visible
For a single header row, open the worksheet and select the View tab. Choose Freeze Panes, then Freeze Top Row. Excel keeps the first row visible as you scroll down, regardless of which data row you reach.
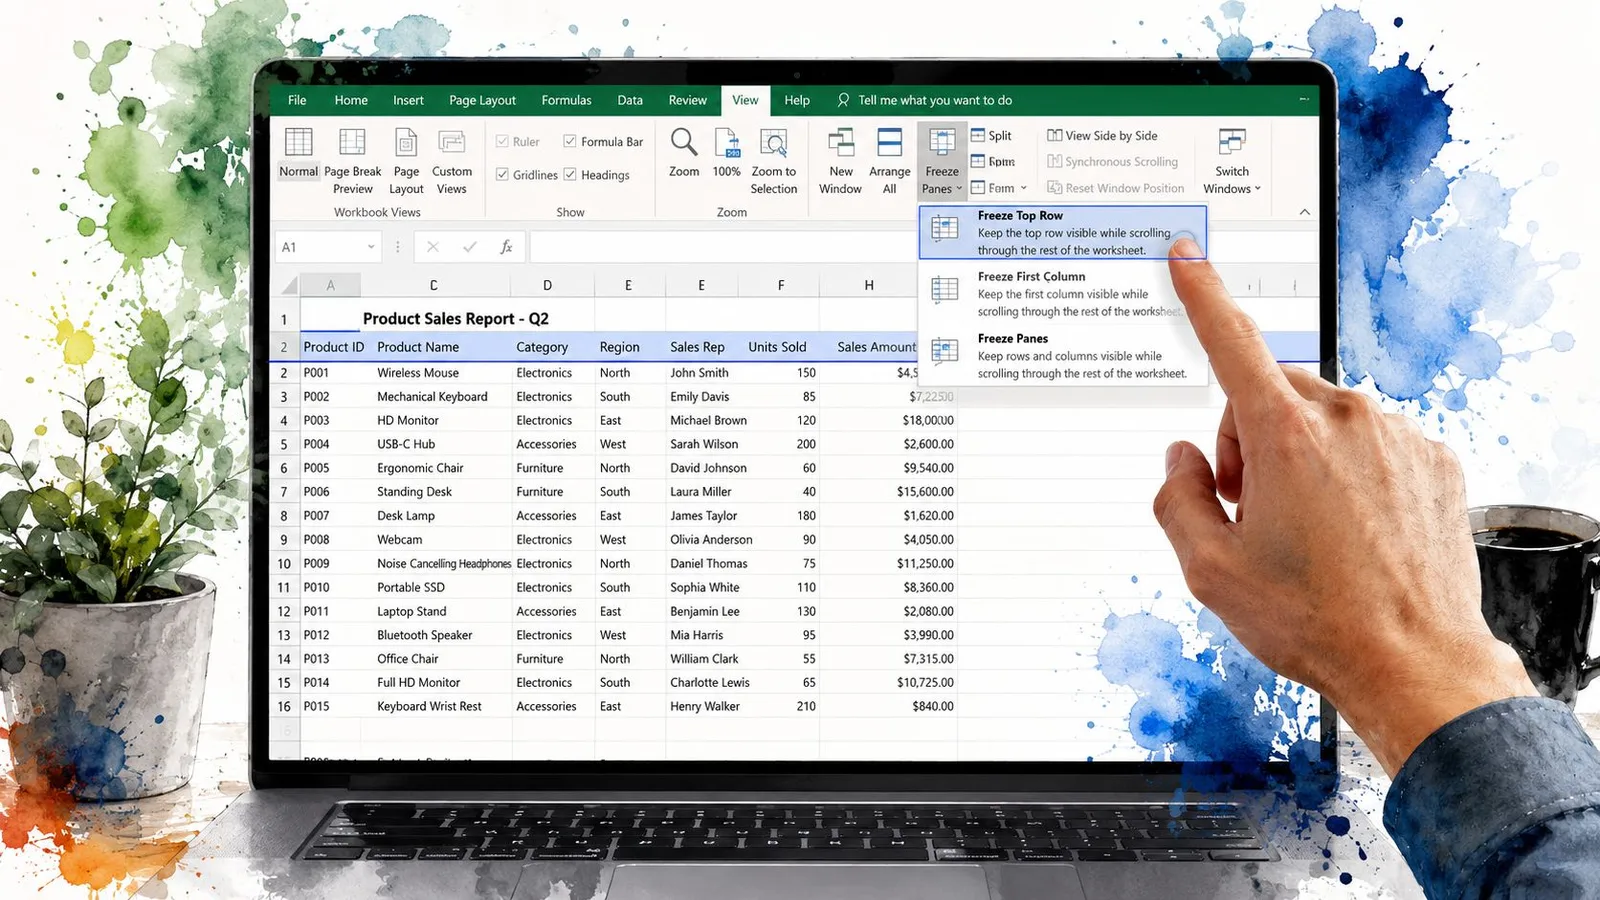
You don’t need to select a cell in the first row before using Freeze Top Row. This command targets the top row directly, which makes it the simplest choice for a conventional table with headings in row 1.
Freeze several rows
If the information you need includes a title row and a header row, select the cell in the row immediately below the last row you want to keep visible. For example, select a cell in row 3 to keep rows 1 and 2 visible. Then go to View > Freeze Panes > Freeze Panes.
Excel uses the selected cell as a boundary. Everything above it stays visible, while the area below it scrolls. This same rule lets you freeze any chosen group of top rows without selecting the rows themselves.
Freeze a row and a column together
To keep the top row and the first column visible at the same time, select B2, then choose View > Freeze Panes > Freeze Panes. Microsoft identifies B2 as the selection for freezing the top row and first column together in its Excel for Mac guidance.
The logic is simple: Excel freezes the rows above the selected cell and the columns to its left. Select a different cell when you need a wider frozen area.
If the command appears unavailable, finish editing the active cell first by pressing Enter or Escape. If a freeze is already applied, choose Unfreeze Panes before creating a new arrangement.
The same general workflow is available across Excel for Windows, Mac, iOS, and the web, as Microsoft’s current support documentation shows. The labels and ribbon layout can vary slightly by device, but the purpose of the feature remains consistent.
This short demonstration shows where the commands sit in the ribbon:
Protecting Rows From Being Edited
Protection solves a different problem. It tells Excel which cells users may change after the worksheet is protected.
The workflow has two separate steps. First, set the lock status of cells through Format Cells > Protection. Second, activate protection from the Review tab. Microsoft explains this sequence in its guidance on locking cells to protect them in Excel.
Set the editable cells first
Excel marks cells as Locked by default, but that setting has no effect while sheet protection is off. To create an editable row, select the cells colleagues should fill in, right-click, choose Format Cells, and open the Protection tab. Clear Locked, then select OK.
For a tracker, those might be the Date, Owner, and Notes cells. Formula cells, headings, and completed reference values can remain locked.
The Locked checkbox is a setting, not an active barrier. Sheet protection is what makes the setting enforceable.
Turn on worksheet protection
After opening the input cells, go to Review > Protect Sheet. Excel displays options for the actions users may perform, so choose the permissions that match the worksheet. You can add a password if you want to limit who can turn protection off, but record it somewhere reliable.
Test the sheet immediately. Click an input cell and type a harmless test value, then try selecting a formula or heading cell. If you can’t type anywhere, the input range was probably left locked.
When you need to change the layout or revise protected formulas, use Review > Unprotect Sheet. Enter the password if one was set, make the changes, then reapply protection. Microsoft notes that changing lock status requires protection to be reapplied.
For related file-based workflows, organizing and working with files in Drive can help teams keep the current workbook and supporting documents together, but it doesn’t replace Excel’s own worksheet protection controls.
Mixed Permissions for Shared Workbooks
A shared budget rarely needs every cell in a row treated identically. The row might contain a protected formula in the Total column, a fixed category label, and an input cell where a colleague enters an amount. Full-row protection would stop the useful edit along with the risky one.
The practical setup combines both features:
- Freeze the heading area so people can identify columns while scrolling.
- Select the input range and clear Locked under Format Cells > Protection.
- Leave formulas and fixed labels locked.
- Protect the sheet and allow the actions collaborators need, such as selecting editable cells or using filters where appropriate.
- Test a real entry before sharing the workbook.
This arrangement protects formulas without turning the file into a read-only form. It also keeps a tracker easier to use because the headings remain visible and the permitted input cells remain usable.
Keep filters usable
Protection settings can affect table work. If colleagues need to filter a protected worksheet, enable the relevant filtering permission in the Protect Sheet dialog and test it with the actual table. Don’t assume that a filter will behave exactly as it did before protection.
Full-row password locking is often a poor default for collaborative files. It can block data entry, make troubleshooting harder, and force an owner to remove protection for ordinary updates. Mixed permissions match the workbook’s real structure more closely.
| Approach | Best For | What It Prevents |
|---|---|---|
| Freeze Panes | Long tables and trackers | It prevents headings from disappearing during scrolling |
| Full protection | Reference sheets or finished outputs | It prevents edits to protected cells |
| Mixed permissions | Shared budgets, forms, and active trackers | It prevents changes to formulas and fixed content while allowing approved inputs |
For teams working in Google Sheets, the ChatGPT Sheets extension is another spreadsheet tool to evaluate alongside native protection settings. Keep the permission design in the spreadsheet itself, and use automation only to support the workflow.
Quick Fixes and Takeaways
Most Excel locking problems come from choosing the wrong meaning of “lock,” selecting the wrong cell, or protecting the sheet before opening the input range. Use this checklist when the worksheet doesn’t respond as expected.
- Freeze Panes is greyed out: You’re editing a cell. Press Enter or Escape, then try the View command again.
- The wrong rows are frozen: Choose View > Freeze Panes > Unfreeze Panes, select the cell below the rows you want to keep, and apply Freeze Panes again.
- Frozen rows won’t disappear: Use View > Freeze Panes > Unfreeze Panes. This removes the current freeze so you can create a new one.
- You can’t type anywhere on a protected sheet: The cells intended for data entry are still locked. Unprotect the sheet, clear Locked for those cells, and protect it again.
- A locked cell is still editable: The Locked checkbox alone doesn’t enforce anything. Confirm that Protect Sheet is active from the Review tab.
- Filters stopped working: Unprotect the sheet, enable the filtering permission when you protect it again, and test the table with a normal filter.
The distinction is easy to remember: freezing handles visibility, protection handles edit control. A shared workbook usually needs both, but not in the same way for every cell.
You can undo a freeze with Unfreeze Panes, and you can revise cell permissions by unprotecting the worksheet. Start with a small test range, verify the behavior, and then apply the setup to the full workbook.
GPT Workspace works inside Google Workspace apps, including Sheets and Drive, for tasks such as generating spreadsheet content, analyzing selected data, creating formulas, and finding information across stored files. Visit GPT Workspace to explore a workflow that can support your spreadsheet preparation and collaboration tasks.