





Classify Data in Google Sheets With =GPT_CLASSIFY: Labels and Confidence in One Formula
Classify data in Google Sheets with the new =GPT_CLASSIFY formula. Your own categories, confidence scores, 100 cells per call, and a 10x cheaper model.


Sorting 800 support tickets into “Bug, Feature, Question” by hand takes an afternoon. Doing it with a generic AI prompt is faster, but you get “bug report”, “Bug.” and “It’s a bug” in the same column. We built a formula to classify data in Google Sheets that fixes both problems.
=GPT_CLASSIFY shipped this week in GPT Workspace, a Chrome extension and Google Workspace Add-on that puts AI directly inside Docs, Sheets, Slides, and Gmail. It takes a cell or a range, a list of categories, and returns exactly one of your labels, with an optional confidence score next to it.
This post covers the syntax, the four output modes, how to get sharper results with category descriptions, and what it costs. If you are new to AI formulas in Sheets, start with our guide to using AI in Google Sheets and come back.
Why a Dedicated Formula to Classify Data in Google Sheets
You could already classify with =GPT("Classify this ticket as Bug, Feature or Question: " & A2). It works, most of the time.
The trouble is that a text model is built to write, not to choose. It adds a period, rewrites “Feature” as “Feature request”, or explains its reasoning in the cell. Then your COUNTIF breaks and you spend ten minutes cleaning labels you never asked for.
=GPT_CLASSIFY runs on a decision model instead. It is asked a single-choice question and answers with a probability for each category, so the output is always one of your labels, spelled exactly the way you wrote it.
That design has three side effects you will notice on day one. It is faster than a text formula, it is about 10x cheaper, and it can tell you how sure it is.

GPT_CLASSIFY Formula Syntax
The full signature is:
=GPT_CLASSIFY(value, categories, [instructions], [output], [bypassCache])| Parameter | What it takes | Default |
|---|---|---|
value | One cell (A2) or a range of up to 100 cells (A2:A50). A range returns one result per cell, in the same shape. | required |
categories | A comma-separated string (“Bug, Feature, Question”) or a range. One column holds labels; two columns hold a label and its description. | required |
instructions | Context for the classifier, for example “Support tickets of a SaaS product”. | "" |
output | label, confidence, both or all. | label |
bypassCache | TRUE to ignore the cache and classify again. | FALSE |
The simplest call looks like this:
=GPT_CLASSIFY(A2, "Bug, Feature, Question")Drag it down and every row gets one of those three words. Nothing else.
Step 1: Put Your Categories in a Range
A comma-separated string is fine for a quick test. For anything you will reuse, put the labels in their own column and reference it with an absolute range.
Say your labels live in F2:F5. The formula becomes =GPT_CLASSIFY(A2, $F$2:$F$5), and renaming a category later is a one-cell edit.
Step 2: Add a Description Next to Each Label
This is the single biggest accuracy lever. Add a second column with a one-line description, and pass both columns as the range.
| F | G |
|---|---|
| Bug | something is broken or behaves unexpectedly |
| Feature | asks for a new capability that does not exist yet |
| Question | asks how to do something that already works |
| Billing | invoices, refunds, plan changes, payment failures |
Now =GPT_CLASSIFY(A2, $F$2:$G$5) knows that “How do I export to PDF?” is a Question, not a Feature, even though both mention a capability. In our tests on real ticket queues, descriptions moved borderline rows noticeably more often than the instructions parameter alone.
Step 3: Classify a Whole Range in One Formula
Instead of dragging, point the first parameter at the range itself:
=GPT_CLASSIFY(A2:A50, $F$2:$G$5)One formula fills 49 rows. Identical texts in the range are classified once, and if you later edit three cells, re-running the range only classifies those three.
The limit is 100 cells per call. For a 1,000-row sheet, write ten range formulas or drag a single-cell version; both work, the range version is just fewer formulas to manage.
 Try GPT Workspace
Use ChatGPT, Claude, and Gemini directly inside Google Docs, Sheets, Slides, Gmail, and Drive. No tab switching.
Get Started FreeConfidence Scores: Know Which Rows to Review
The fourth parameter, output, is where this formula earns its keep. Four modes:
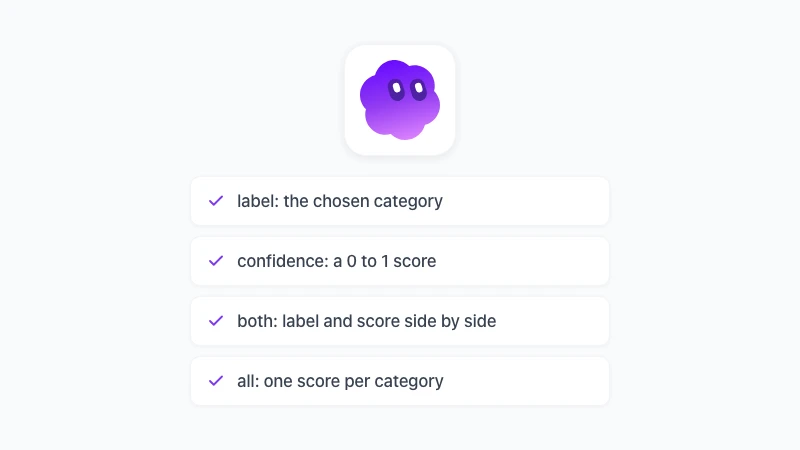
label(default) returns the chosen category.confidencereturns a number from 0 to 1 for the chosen category.bothreturns the label and the score in two adjacent columns.allreturns one score per category, in the order of your category range.
Here is both on a ticket:
=GPT_CLASSIFY(A2, $F$2:$G$5, "Support tickets", "both")Result: Bug in B2 and 0.94 in C2. A row like “the export is slow, can you make it faster?” might come back Feature with 0.52, which is the model telling you it also considered Bug.
Flag Low-Confidence Rows for a Human
Put a filter on column C for values under 0.7. That is your review queue, and on a typical support export it is somewhere between 5 and 15 percent of rows.
Everything above the threshold is done. You read 80 tickets instead of 800, and the ones you read are the ones that actually needed a human.
A conditional format works too: highlight C2:C500 in amber when the value is below 0.7, red below 0.5.
Build a Score Heatmap With “all”
all returns the full distribution. With four categories it fills four columns, each holding that category’s probability.
=GPT_CLASSIFY(A2, $F$2:$G$5, , "all")Apply a color scale across the block and you get a heatmap of your whole dataset. Rows that are bright in two columns are the ambiguous ones, and clusters of ambiguity usually mean two of your categories overlap and should be merged or described more precisely.
Categorize Text in Google Sheets With AI: Five Real Setups
The ticket example is the obvious one. These are the setups we see most in customer sheets.
Sentiment on reviews. Categories “Positive, Neutral, Negative”, instructions “App store reviews”. Use both and sort by confidence to find the reviews that are neither clearly happy nor clearly angry; those are the ones with the useful product feedback.
Lead routing. Categories as a two-column range: “Enterprise | more than 200 employees or mentions procurement”, “SMB | small team, asks about pricing”, “Student | .edu email or mentions a course”. Classify the free-text “tell us about your company” field and route in a FILTER formula.
Expense coding. Bank descriptions are messy. “AMZN Mktp US*2K4” is a vendor string, not a category, so pass “Software, Travel, Meals, Office, Other” with a description per bucket and let the model read through the abbreviations.
Survey themes. Open-ended “what should we improve?” answers. Run all across six themes, then SUM each column to get a theme ranking without reading a single answer twice.
Content tagging. Blog drafts, product descriptions, or job posts classified by topic, audience, or language. Multilingual input is fine; the categories can be in English while the text is in Portuguese.
The pattern in every case is the same. Write categories that do not overlap, describe each one in a sentence, and let confidence decide what a person needs to look at.
How It Compares to the Native Google Sheets AI Function
Google Sheets has a built-in =AI() function on eligible Workspace plans, and it can categorize text. If you are already on Business Standard or above, it is worth knowing where the two differ.
=AI() in Google Sheets | =GPT_CLASSIFY | |
|---|---|---|
| Availability | Business Standard and above, per Google’s plan limits | Every GPT Workspace plan, including free |
| Monthly cap | 5,000 cells (Business Standard/Plus), 25,000 (Enterprise) | Pay-as-you-go at the model’s actual cost |
| Batch size | First 350 selected cells per Generate click, per Google’s help page | 100 cells per formula, unlimited formulas |
| Output | Free text | One of your labels, exact spelling |
| Confidence | No | 0 to 1 per category |
| Nesting in other formulas | Not supported | Works inside IF, FILTER, COUNTIF |
That last row matters more than it looks. Google’s documentation states that embedded AI functions are not supported, so =IF(AI(...)="negative", ...) does not work. =GPT_CLASSIFY is a normal custom function, so =COUNTIF(GPT_CLASSIFY(A2:A50, $F$2:$F$5), "Bug") is a one-liner.
The native function is a good fit for one-off questions on a small table. For classification at scale, with labels you can count on, a dedicated formula is the better tool.
Pricing, Caching, and Fallback Behavior
=GPT_CLASSIFY runs on TypeSafe Jev, a decision model that answers a single-choice question with a probability per category. It is charged at the model’s actual cost, which comes out roughly 10x cheaper than a =GPT() text call on the same cell.
Caching keeps that bill low in practice. A cell is classified once and the result is stored, so re-opening the sheet, copying the formula, or recalculating does not spend anything. Pass TRUE as the fifth parameter only when you have changed the categories and want a fresh answer.
If the decision model is unavailable, the formula falls back to the Standard text model with a strict enum schema. Your sheet never shows an error for that reason; you still get a valid label, and only the confidence column is left blank until the decision model is back.
Blank input cells return blank results instead of a guess. That keeps dragged formulas clean at the bottom of a column.
Try GPT Workspace
Use ChatGPT, Claude, and Gemini directly inside Google Docs, Sheets, Slides, Gmail, and Drive. No tab switching.
Get Started FreeTips From the First Week
A few things we learned watching the first classifications come through.
Keep category lists short. Five to eight well-described categories beat twenty vague ones; past that, add a second pass with a sub-category formula that only runs on rows where the first label matches.
Use the instructions parameter for domain context, not for rules. “Support tickets of a B2B invoicing app” helps. “If the text mentions money, pick Billing” belongs in the Billing description instead, where the model reads it next to the label.
Clean before you classify. Duplicate rows cost nothing extra thanks to caching, but they skew your counts. Our walkthrough on finding duplicates in Google Sheets is a ten-minute pre-step.
And if you prefer describing the task in plain English, the Sheets sidebar on the classify and categorize data page shows how: it can write the formula for you. Type “classify column A into Bug, Feature, Question with confidence” and it drops a =GPT_CLASSIFY call with both into the next column. The full parameter reference lives in the GPT_CLASSIFY documentation.
FAQ
Conclusion
The fastest way to classify data in Google Sheets is a formula that can only answer with one of your labels. =GPT_CLASSIFY does that, tells you how confident it is, handles 100 cells per call, and costs about a tenth of a text prompt.
Write your categories in a two-column range, use both to build a review queue, and let the sheet do the first pass. Install GPT Workspace and try it on the next export you were planning to sort by hand.